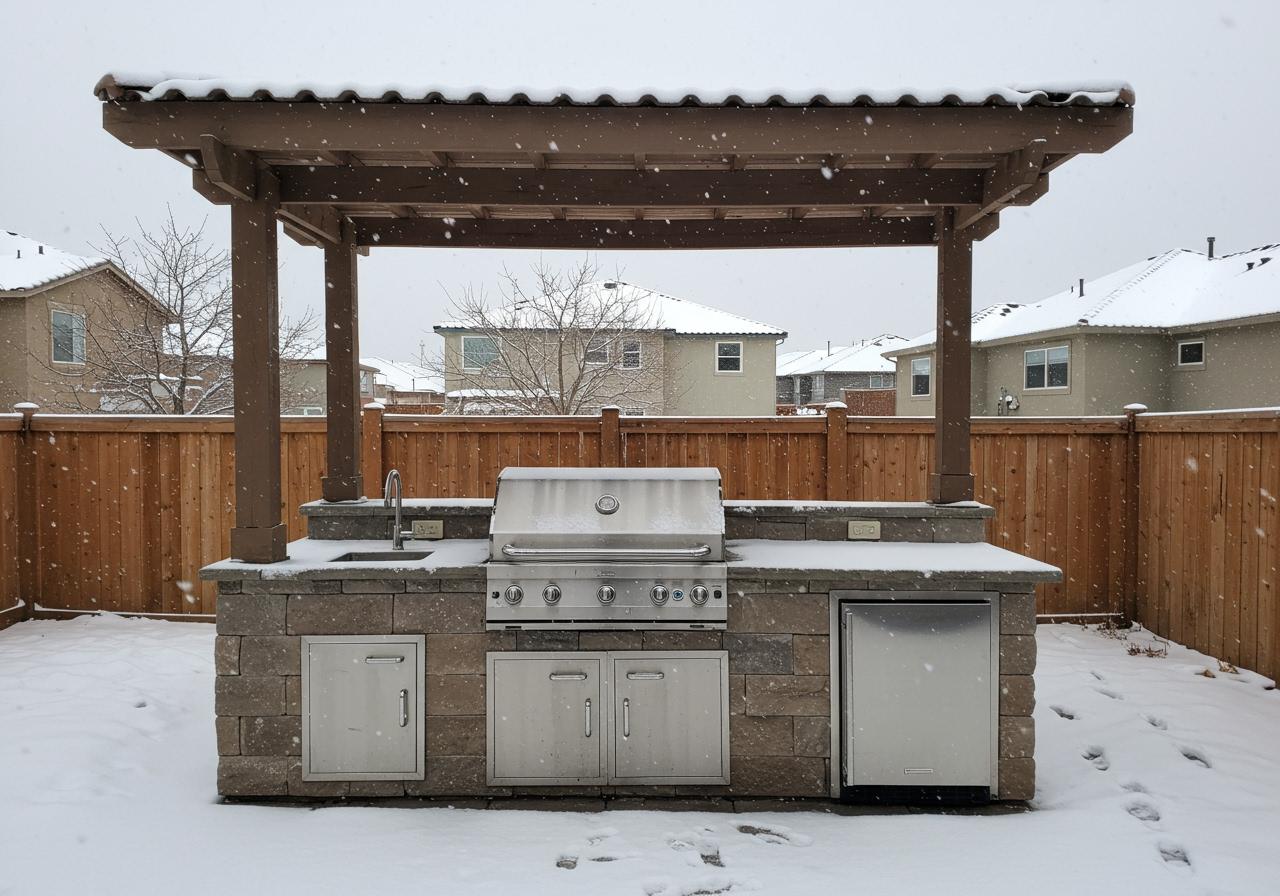
Outdoor kitchens are an essential part of the Southern Utah lifestyle, allowing us to enjoy the beautiful scenery and mild evenings year-round. However, even with our relatively mild climate compared to Northern Utah, the low temperatures in Washington County can bring hard freezes, especially at night. Failing to properly winterize your outdoor kitchen's plumbing and appliances is the single most costly mistake a homeowner can make.
This comprehensive guide covers everything from disconnecting water lines to protecting UV-sensitive finishes, ensuring your custom outdoor space built by Jim Savage Construction is ready for spring.
The Non-Negotiable Step—Plumbing and Water Systems
The #1 threat to any outdoor kitchen in a freezing climate is water freezing in the pipes or ice maker lines. When water turns to ice, it expands, cracking copper, PVC, and even fittings.
Shut Down the Water Supply
Locate the Shut-Off Valve: Your outdoor kitchen plumbing should have its own dedicated master shut-off valve. This is typically located indoors (e.g., in the garage, utility closet, or basement) where the line splits from the main house plumbing, or in a covered exterior valve box.
Turn Off the Water: Completely turn the handle or valve to the OFF position.
Disconnect Quick-Connect Fixtures: If you have a hose bib connection nearby, disconnect any hoses immediately.
Drain All Remaining Water from the Lines
Open the Faucet: Go to your outdoor sink faucet and turn both the hot and cold handles to the full ON position. This releases the pressure and allows the water in the line to drain out. Let it run until no water is coming out.
Open Drain Valves (If Installed): A professionally installed outdoor kitchen may include bleed valves or drain ports on the low points of the plumbing lines. Open these valves to ensure every last drop of water drains out of the system due to gravity.
Blow Out the Lines (Recommended Professional Step)
While draining is good, air compression is the only way to ensure water is completely removed, especially in long or complex runs.
Use a Compressor: Use an air compressor set to a low PSI (around 40-50 PSI) and attach it to the line (usually where the water supply was shut off).
Blast Air: Briefly run compressed air through the lines until only a fine mist—or nothing at all—comes out of the open faucet. This ensures all residual water is removed and prevents any small pockets of water from freezing.
Winterize the Sink and Drain
Pour Antifreeze: Pour a small amount (about 1 cup) of non-toxic, RV/Marine plumbing antifreeze down the sink drain. This liquid is typically pink and available at any local hardware store.
Protect the Trap: This antifreeze sits in the P-trap (the curved section of pipe beneath the sink) and prevents the standing water there from freezing and cracking the plastic or metal trap. Do not use automotive antifreeze.
Securing Built-In Appliances
Outdoor kitchen appliances are built tough, but they are not immune to the rigors of winter storage, especially when high winds and low temperatures are involved.
The Built-In Grill and Side Burners
The Deep Clean (Crucial for Pest Control): Completely clean your grill grates, burners, and drip trays. Food debris and grease attract rodents and insects seeking warmth during the cold months. A clean grill is your best defense against pests making a winter home in your expensive components.
Disconnect the Gas:
Propane: Turn off the valve on the propane tank and disconnect the regulator hose from the grill. Store the tank separately, ideally in a cool, ventilated place (but never indoors).
Natural Gas: Locate the dedicated ball valve shut-off for the grill (usually behind it, inside the cabinet). Turn this valve to the OFF position (perpendicular to the pipe).
Protect the Exterior: Apply a thin layer of stainless steel protector or mineral oil to all exposed stainless steel surfaces to prevent rust and corrosion from condensation.
Cover Tightly: Use a high-quality, breathable, custom-fit cover designed specifically for your built-in grill model. Ensure the cover is tightly secured so the strong Southern Utah winds cannot lift it off.
Refrigerators, Ice Makers, and Beverage Centers
This is the second most common area for damage after plumbing.
Ice Maker Water Line: If you have a built-in ice maker, the water line must be completely drained and blown out, just like the sink line (refer back to Section 1).
Power Down: Unplug the unit completely from the electrical outlet.
Defrost and Clean: Remove all contents, turn off the unit, and let it fully defrost. Thoroughly clean the interior with a mild soap and water solution, paying attention to door seals.
Leave the Door Ajar: This is a vital step! Use a towel or a small block to keep the refrigerator and/or ice maker door slightly open. This prevents mold, mildew, and stale odors from building up over the winter.
Secure the Exterior: If the unit is freestanding, consider removing it and storing it indoors. If it's built-in, cover the entire unit with a breathable cover, or ensure the main kitchen cover completely protects the front face.
Maintaining Surfaces and Masonry
While surfaces don't have water inside them, they need protection from the combination of UV exposure and nightly frost that can accelerate wear and tear.
Countertops (Granite, Quartzite, Concrete, Porcelain)
Deep Clean: Use a neutral, pH-balanced cleaner to remove all grease, food residue, and dust.
Re-Seal Natural Stone: If you have natural stone (granite, quartzite, marble), the fall is the perfect time to apply a new coat of professional-grade stone sealer. This protects the porous material from moisture intrusion during freeze cycles and against the intense winter sun fading. Porcelain and high-grade concrete typically do not require re-sealing.
Cover: While countertops are durable, placing a cover over the entire surface reduces the thermal shock caused by sunny days and freezing nights, extending the lifespan of the material.
Stucco and Stone Veneer Cabinetry
Inspect Masonry: Walk around the entire outdoor kitchen structure. Look closely for any hairline cracks in the stucco or mortar joints in the stone veneer.
Repair Immediately: In the dry Southern Utah environment, any small crack can allow water in during a rare winter rain. If a freeze hits while that water is trapped, it will expand the crack. Have any structural or surface cracks sealed with exterior-grade caulk or stucco repair compound before winter sets in.
Electronics, Furniture, and Final Site Prep
The final elements require minimal work but are often the most overlooked.
Entertainment Electronics
Remove or Protect: Any outdoor-rated television, stereo system, or soundbar should be either removed and stored indoors or encased in a heavy-duty, weather-resistant TV enclosure. Even "weatherproof" electronics are best protected from extended exposure to condensation and extreme cold.
Cable Management: Disconnect and label all loose cables and secure them neatly to prevent wind damage or rodent chewing.
Furniture and Accessories
Store Cushions: All fabric cushions should be stored indoors in a dry, climate-controlled area to prevent mold, mildew, and UV fading.
Clean and Cover Frames: Clean the frames of patio furniture (metal, wicker, or wood). Apply wax or wood sealant as needed. Use high-quality, secured covers for chairs and tables, stacking them where possible to reduce the footprint.
Secure Loose Items: Store away small, lightweight items like grilling tools, decorative planters, and small accessories that could become airborne in a severe wind event.
Hard Water Defense (Southern Utah Special Tip)
Southern Utah is known for hard water. Before you shut down the system, consider a deep clean:
Faucet Aerators: Remove the faucet aerator screen and clean out any calcium buildup. Store it separately and reinstall it in the spring.
Stainless Steel Sinks: Clean the stainless steel sink thoroughly and apply a thin layer of mineral oil or stainless steel polish to repel water spots and minimize the chance of mineral etching during the cold, dry season.


